Giving
For treasurers
Two things feed giving: the gifts your church received, read from your giving platform, and the payments your church made to missionaries, which you report each month. Missionary Lane traces one to the other. Everything here is under Giving in the admin's top bar.
On this page
The Finance switch #
- Giving is visible only to people with Finance switched on, signed in with two-step sign-in. Owners always have it.
- An owner switches it on for a treasurer or finance committee member in Settings → Members, with the Finance switch next to their name. They can be an editor, admin or owner.
- Members without Finance, including admins, don't see Giving at all, and the database refuses them too.
- Only admins and owners can change Giving → Settings; everyone with Finance can read them.
The Overview tab shows this month's gifts, the payments made, the money waiting in the fund, when gifts were last brought in, any connection that needs attention, and a Setup checklist:
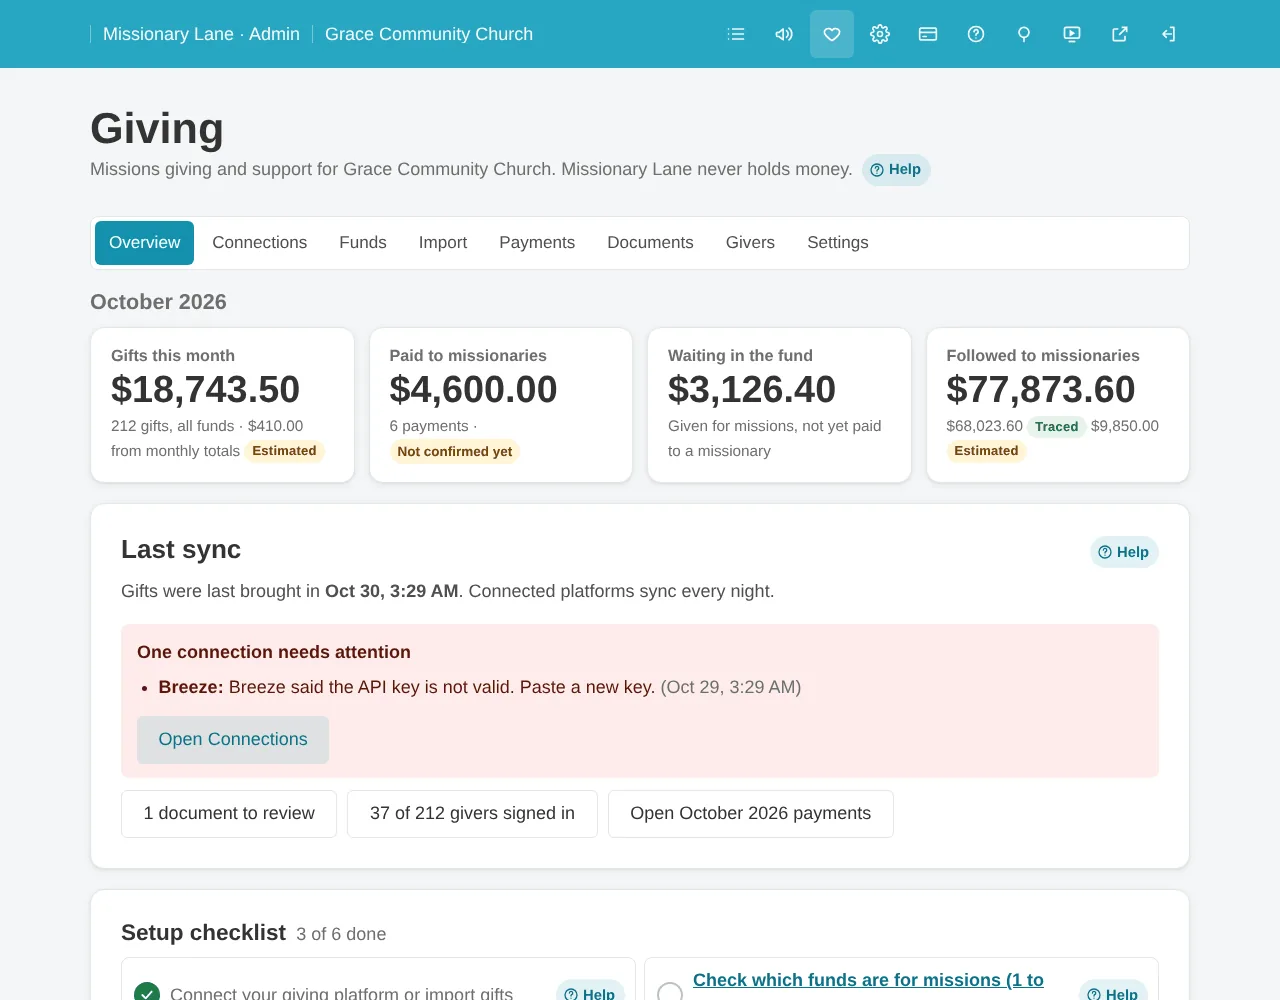
- Connect your giving platform.
- Choose which funds are for missions.
- Set each missionary's usual amount and payment day.
- Confirm a month of payments.
- Match givers who are waiting.
- Turn on giving in the gallery.
Connect your giving platform #
Open Giving → Connections and follow the steps on the card for your platform. Connections only read gifts; they never move money.
| Platform | What you need |
|---|---|
| Planning Center Giving | A personal access token from api.planningcenteronline.com, made by someone who can see every donation in Giving: its Application ID and Secret. Gifts made in the Church Center app or on Church Center online are kept in Planning Center Giving, so choose this one. |
| Breeze ChMS | Your Breeze address and the API key from Extensions → API. |
| Rock RMS | Your Rock address and a REST key (Admin Tools → Security → REST Keys) added to the RSR - Finance Administration role. |
| MinistryPlatform | Your address, and an API client's Client ID and Client Secret (Administration → API Clients) with a client user who can read donations. |
| Pushpay | A client ID, client secret and organization key, which Pushpay support gives on request. While you wait, export a CSV from Pushpay and import it. |
| Spreadsheet | A CSV file from any giving system or bank. See Import a spreadsheet. |
| Typed in | Nothing. For envelopes, cash or a paper ledger. See Type in gifts. |
| Built-in giving | Planned A later phase. |
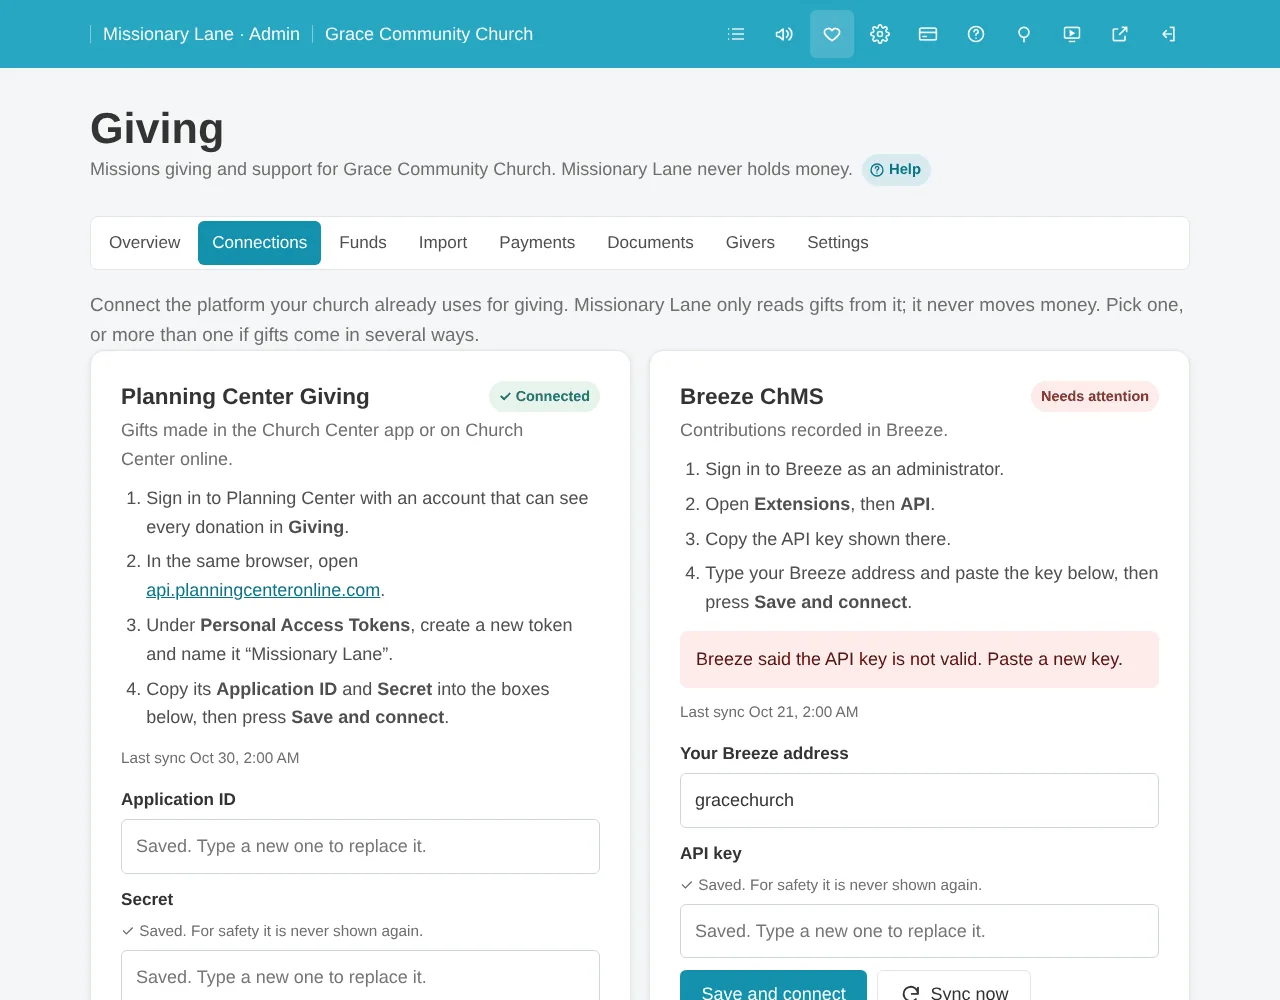
- A key or secret you save is stored encrypted and is never shown again, not even to you. To replace one, paste the new key and press Save. The card says Connected when a key is saved.
- Connected platforms bring in new gifts every night. Sync now on the card brings them in straight away.
- If a sync fails, the card and the Overview say why, for example a key that no longer works.
Which funds are for missions #
After the first sync or import, open Giving → Funds and choose a kind for each fund. A new fund says Choose a kind until you do. Press Save funds; givers see only the missions part of their gifts.
| Kind | Counts for missions |
|---|---|
| Missions | All of it. |
| General fund | The share you type, for example 10%. |
| Special offering | None. |
| Not missions | None. For building, benevolence and the like. |
Import a spreadsheet #
- In your giving system or bank, export the gifts as a CSV file. Include the date, amount and fund, and the giver's name and email if you can.
- Open Giving → Import and choose the file.
- In Where the file came from, pick Planning Center Giving export, Breeze contributions export, Rock RMS transactions or Pushpay export, or Guess from the headings for anything else.
- Choose what each row is: One gift with its date (shown as Traced) or A monthly total, without dates (shown as Estimated).
- Check Match the columns. Date and Amount are required.
- Read the Preview: the number of gifts, the total and the first rows. Rows it can't read are listed and left out.
- Press Save import.
- Importing the same file twice doesn't add the gifts twice.
- Amounts in brackets or with a minus sign, and rows marked refunded, are saved as refunds.
- Dates like 10/05/2026 are read month first.
- To take an import back out, press Undo next to it in Recent imports.
- Planned Ready-made presets for Tithe.ly, Subsplash and Givelify exports. Until then, use Guess from the headings and check the column matching.
Type in gifts #
For offering envelopes, cash or a paper ledger, use Type in gifts on the Import page. For each gift, type the date (10/05/2026) or, for a monthly total, only the month (10/2026), then the amount, the fund and, if you like, the giver. Press Add a row for more, then Save these gifts. Monthly totals are shown to givers as Estimated.
Report payments to missionaries #
Gifts are followed to missionaries through the payments the church makes. Each month, record what was paid and confirm it. Until a month is confirmed, its payments don't count.
Support amounts and payment days #
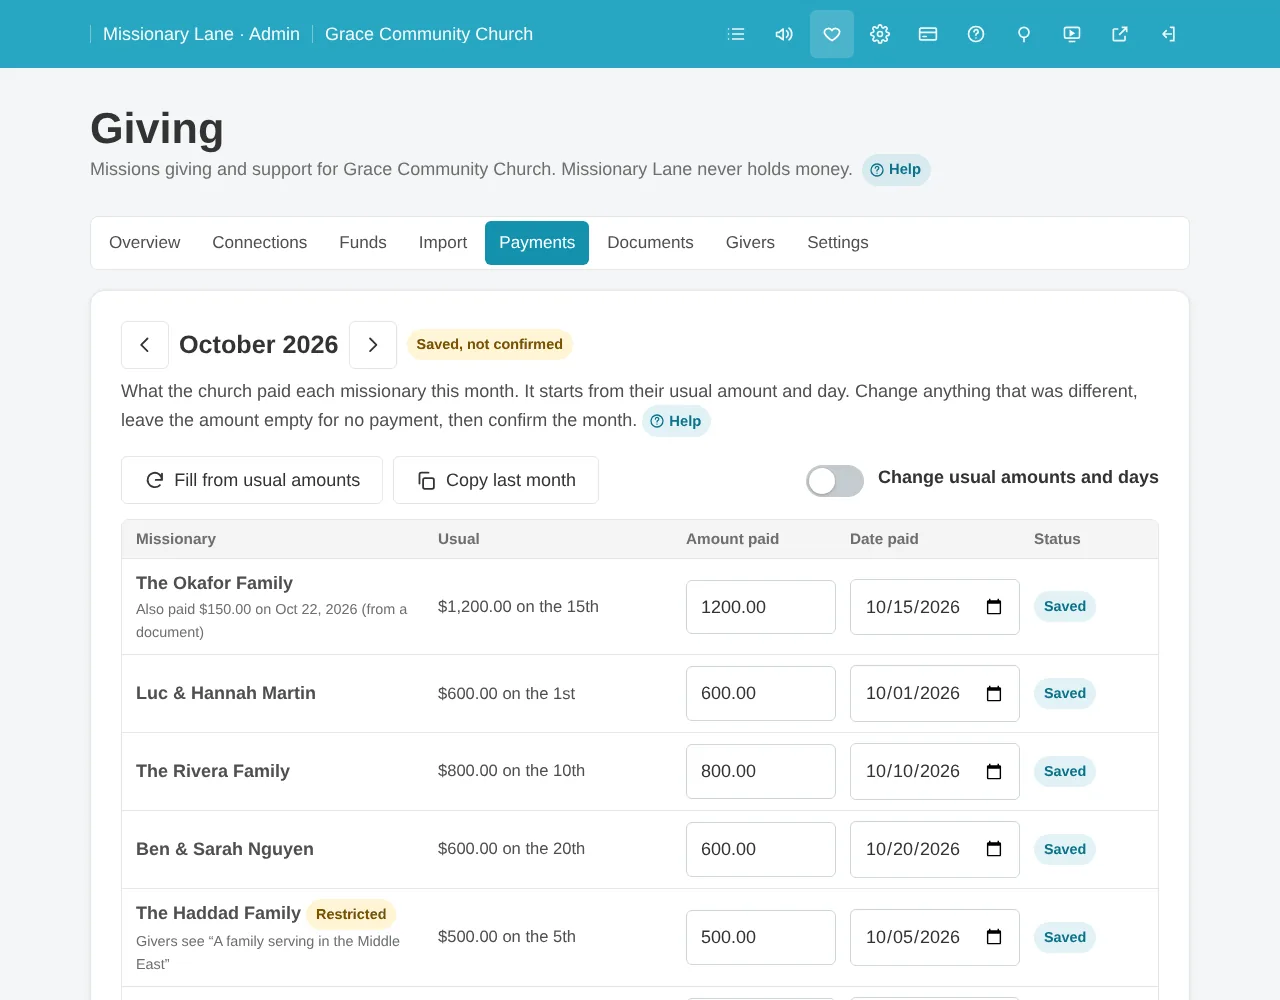
Each missionary has a usual amount and a payment day, the 1st to the 28th. They fill in each new month for you. On the Payments page, switch on Change usual amounts and days, type each amount, choose each day and press Save usual amounts. The usual amount is the same as Monthly support in the missionary's details.
The monthly grid #
- Open Giving → Payments. It opens on this month; use the arrows for other months.
- A new month starts from each missionary's usual amount and day, marked Proposed. Fill from usual amounts does this again, and Copy last month copies last month's amounts onto the same days.
- Change any amount or date that was different. Leave the amount empty when there was no payment, for example in the months between quarterly payments.
- Press Save to keep your work without confirming it.
- When the page matches what was paid, press Confirm for that month, check the number of payments and the total, and press Confirm month.
- Every date must be in the month you're confirming.
- To change a confirmed month, press Make changes, fix it, then confirm it again. Givers' pages are worked out again from the confirmed payments.
- Restricted missionaries appear here under their real name, marked Restricted, with the alias givers see.
Read a payment document #
Instead of typing, upload a bank statement, a check register or a photo of the payments list. The AI reads each payment and suggests the missionary; nothing is saved until you check it.
- Open Giving → Documents and choose a PDF or photo, up to 10 MB.
- Check each line against the document: the amount, the date paid and the missionary. Lines marked Choose one or Check this need a closer look.
- For a line that isn't a missionary payment, choose Not a missionary payment.
- Leave Remember this payee for next time ticked so the same payee is matched by itself next time.
- Press Apply payments, then open Payments and confirm the month.
Reading a document uses AI credits, or your own AI key.
Email them in #
The Documents page shows your church's private email-in address. Forward statements to it and they appear in Documents to review. Keep the address private: anyone who has it can send documents to your church.
Coming later #
- Planned Importing payments from a spreadsheet.
- Planned Reading payments from your accounting system.
- Planned Recording givers' pledges from the admin.
Match givers #
When someone signs in to My missions, they're matched to their gifts by email. If their email isn't in your giving records, they wait in Giving → Givers and see nothing until you match them.
- Open Giving → Givers.
- Choose which giver this is: one of the suggestions, or Someone else to pick from every giver.
- Press Match. They can see their missions straight away. If they don't give at your church, press Not a giver here.
Turn on giving in the gallery #
- Open Giving → Settings.
- Type Your giving page: the address where people give to your missions fund, such as your Church Center giving page. It must start with
https://. - Choose the Button text, for example “Give to missions”.
- In What givers should know, say that gifts go to the missions fund and that the church decides how it's shared. It's shown beside the button.
- Switch on Turn on giving in the gallery, and Show our missions picture if you want the Our missions page. Then press Save giving settings.
Before you turn it on, read A note on taxes and check the wording with your church's CPA.